Monday, January 31, 2011

Banana Split Cake

by no means is this a cooking blog....
but occasionally things work out for me in the kitchen, and I like to share with you.
Because if you feed people yummy food, they are often more inclined to let you sew.....

introducing...  Banana Split Cake

you will need:
brownie mix + whatever it calls for,
white cake mix + whatever it calls for,
box of strawberry jello, 
bananas, 
maraschino cherries,
chocolate fudge,
sliced strawberries,
whipped cream

suggested:  small glass dishes for each serving

First, make your brownies as directed.  
Then mix up your white cake mix and split it approximately in half into 2 bowls.  
Put the box of strawberry jello in one.  Bake them.

When they are cool, use a biscuit cutter to cut out small round pieces of each cake/brownie.

I found these mini trifle dishes at walmart for $1.97 each.  They are about 2.5 inches deep.  Very cute.

Slice your bananas into each dish.

Then put your brownie round on top.

Add some strawberries.  Then you can claim your dessert is healthy.

Add a layer of chopped maraschino cherries and the strawberry cake.

Then add the white cake.

On top of that, add a healthy layer of chocolate fudge, some whipped cream and a cherry.
Yum!

I've also linked this project up to:
Anything Related  and  

Link up your latest project every Wednesday on the Elle Belle Creative Your Way Wednesday link party!

Sunday, January 30, 2011

I'm guest posting at.....


 Really, me!


Can you believe it?
I'm in shock myself.
And utterly thrilled!


And while you're there, will you leave a comment please?

Go check it out, and then come back and tell me what you think!

Thursday, January 27, 2011

Hey guess what....

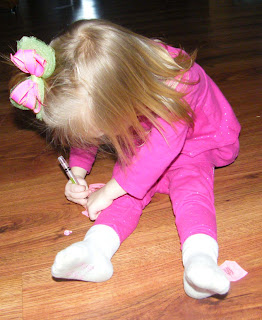
Isn't this funny?  She's very intense when she colors.

I've been working on something....
something kind of big, at least for me...
and SUNDAY I'll be able to let you in on the secret.  
Cause I'm excited to share it with you.
So check back, ok?

Monday, January 24, 2011

10 things I love about My Bedroom Quilt

This is probably the quilt I have made that I am most proud of, and I am thrilled to enter it in

Gen X Quilters

And I AM part of Gen X, by the way... in case you didn't know!

anyway, back to the quilt.  Here's 10 things I LOVE about it!

1.  I love that I made myself be meticulous.  Despite my hatred of seam ripping, I actually ripped a bunch of seams out to make these blocks perfect.
2.  I love that I tried to be creative!  I developed my own block for this quilt.  And even wrote a tutorial for it.  

3.  I love the very loud large scale backing.

3.  Even more, I love the piano key border on the top of the back that peeks out when you fold the top of the quilt over.

4.  I love the polka dot binding.

5.  I love that I quilted it myself on my Bernina 830 Record.  It's an oversized queen.  I wanted the quilting to be perfect and so I actually did practice quilt blocks and I agonized over thread color

6.  I love that I dared to accessorize!   I made this pillow, and it was part of a challenge.  I love it!  I kind of wish the whole quilt was done this way....
 7.  I love the giant block P pillow.  I've started into piecing letters.  My last name starts with a "P"...

8.  I love that in typical Wendy fashion, I didn't buy enough of any fabric and so I ran out of many of them and had to supplement.  I figure I'll never learn to plan ahead.  And did you know that a queen sized quilt takes a lot of fabric??!

9.  I love the Michael Miller Word Search fabric.  It's one of my absolute favorite fabrics and I wish I had a whole bolt of it.  Alas....

10.  I love that I spent 7 months on this quilt, off and on.  And that I finally, finally finished it up!


Oh, and I'd like to tell you I also love that I found sheets at IKEA that match perfectly... but that would be 11 things, which would be excessive, I think......

Thanks for Stopping by The Wendy City..... 

Tea for 2

Finished up my 2 mug rugs... and attempted to photograph them in a fun tea-party way.
This is a rather awkward picture...
I'm not sure I succeeded in the photographing.
  Sorry about that.
I wanted to show you these cool labels I purchased!
They say "the wendy city" and they are exactly perfect to sew into binding.  love them.
You can get some for yourself right here!
So I used the mug rugs as a way to "audition" quilting styles before I tackle the giant quilt.  Here's the one done in a small stipple pattern.

And here's the one done in pebbles.

What do you think?  Do you prefer one over the other?

Saturday, January 22, 2011

My First Quilt -- Part 6 -- Binding

Quiltalong Series:


Here's where we left off.
Now, before you put the binding on, the quilt needs to be trimmed up.  I put it on my cutting mat and attempt to trim right to the edges of the quilt and square it up at the same time.
Depending on how wonky I have gotten with a quilt, sometimes this is more challenging than others!


Now, I forgot to take pictures of putting the binding on the original quilt, so you get to see binding going on the table runner I made using the same blocks.
Allright, so take your binding that you already made, and lay it on the edge of the quilt like so.
You want it to start somewhere in the middle of one side, at least 6 inches from the nearest corner.  Stick a pin in the end, and start sewing about 6 inches from that pin.  So you will have about a 6 inch "tail"


Continue sewing along the edge until you get about a 1/4" from the end.  Backstitch and pull the quilt off the machine.
Pull the binding up so that it makes a 45 degree angle, 
then fold it back down, so that the folded edge at the top is even with both sides of the quilt.
Then start sewing again about 1/4" from the edge. I suggest backstitching when you start this seam.

Keep going until you have done all 4 corners of the quilt.
When you get to the side you started on (the one where you still have a "tail" left), do the corner and then just stitch about an inch.  Like so.

Lay the binding down and cut it a scant 1/2" past the end of the tail.

Put the right sides together to connect the binding up, and put some pins in it.
You kind of have to manipulate the quilt to sew these together, but it can be done!

See?  Sew a 1/4" seam, finger press the seam open, and re-fold your binding the way it was... although now it's connected.

Stick a pin where your seam is and finish sewing the binding to the quilt.

Now... if there's a little bump where the seams connect, don't worry.  See--now you see it, 

and when it's finished, you don't!
Alright.  Now to tack the binding down by hand on the back. 
You're going to want to start at a corner.  Thread a needle with thread that will blend reasonably well with both the binding and the backing.  Tie a knot in it.

Start by taking the needle through in a space that will be hidden by the binding, so that the knot doesn't show.

Then I pin my binding in place and begin sewing it down.

Having a couple of pins helps you go faster.  You can move them as you go along.  


When you get to a corner, 

fold it down as shown and sew around that corner.

These pictures are a little hard to see... so I'm going to send you to a much better resource than me:
Go check it out.  She's brilliant!

So when you get the binding all sewn down, here's the finished quilt.

A closeup of the quilting.

And the back.
Mine measured approximately 19 inches square before washing....
And about 18 inches square after getting all quilty and crinkly!

Thanks for quilting along with me!

Quiltalong Series: